Agent Campaigns
Create agent campaigns through the Agent Campaign page in the console.
What are Agent Campaigns?
Agent Campaigns are groupings of SKU price agents that share configuration criteria.
Get Started
Add a new Agent Campaign by clicking + Create Campaign:
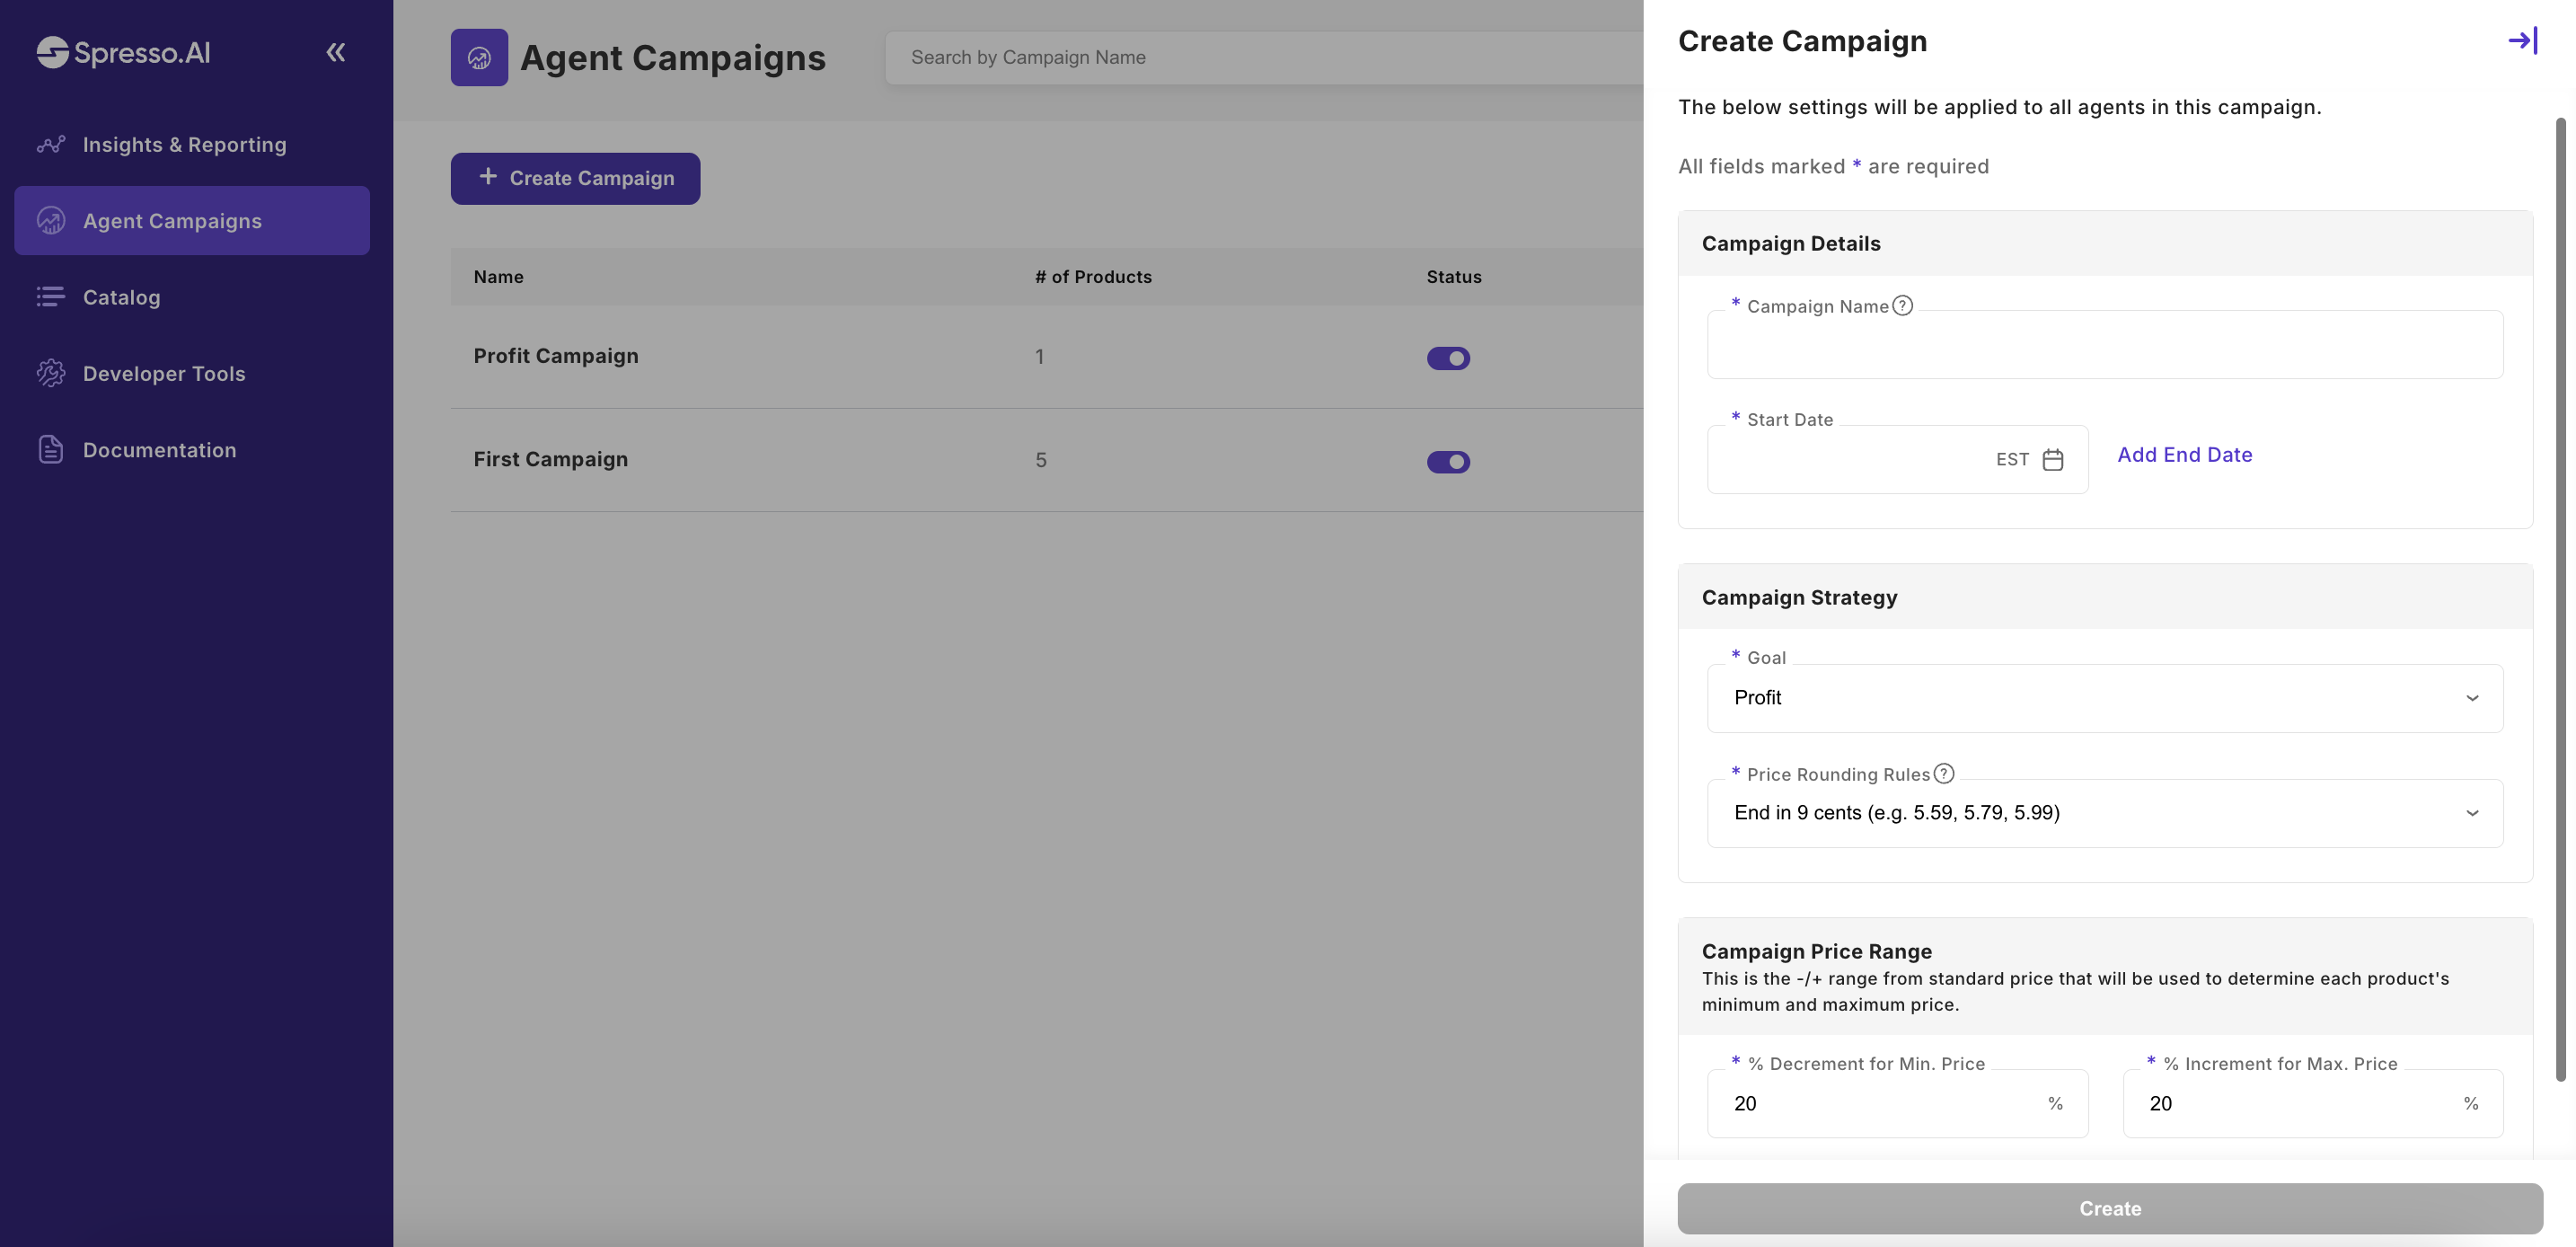
Create Campaign
Fill in Campaign Details. These details will be applied to all products added to the campaign:
- Campaign Name
- Start Date
Select your Campaign Strategy. These values will be applied to all products added to the campaign:
- Goal
- Select your goal to determine the the key performance indicator of your agent.
- Choose between
ProfitorRevenue
- Price Rounding Rules
- Select how auto-generated prices will be rounded to avoid inconsistent price endings.
End in 9 centswill round prices to decimals that end in a 9. Examples of this are 5.59, 5.69, 5.79, 5.89, 5.99 etc.Whole numberwill round prices to a flat number with no decimals. Examples of this are 5.00, 6.00, 7.00 etc.
- Rounding will be applied to the auto-generated price arms determined from your campaign min/max price range. Rounding will never apply to your Standard Price. Your Standard Price will always be one of the five tested price arms.
- The only exception to the rounding rules occurs if there is not enough range between your min and max prices. In that case, auto-generated prices will be split evenly across the five price arms ensuring one is your Standard Price.
- Select how auto-generated prices will be rounded to avoid inconsistent price endings.
Select your Campaign Price Range
This is the -/+ range from each products Standard Price that will be used when auto-generating prices for your agents. Auto-generated prices will never go outside of this range. Auto-generated prices can be edited on an individual basis after products are added.
- % Decrement for Min. Price
- This is the percentage below each product’s Standard Price that will be used as a minimum boundary when auto-generating prices.
- This value is defaulted to 20% as that is our recommendation for a standard agent.
Auto-generated prices can be edited on an individual basis after products are added.
- % Increment for Max. Price
- This is the percentage above each product’s Standard Price that will be used as a maximum boundary when auto-generating prices.
- This value is defaulted to 20% as that is our recommendation for a standard agent.
Auto-generated prices can be edited on an individual basis after products are added.
View Campaign
After creating the campaign, you will land on the campaign details page where you can add products to the campaign by SKU.
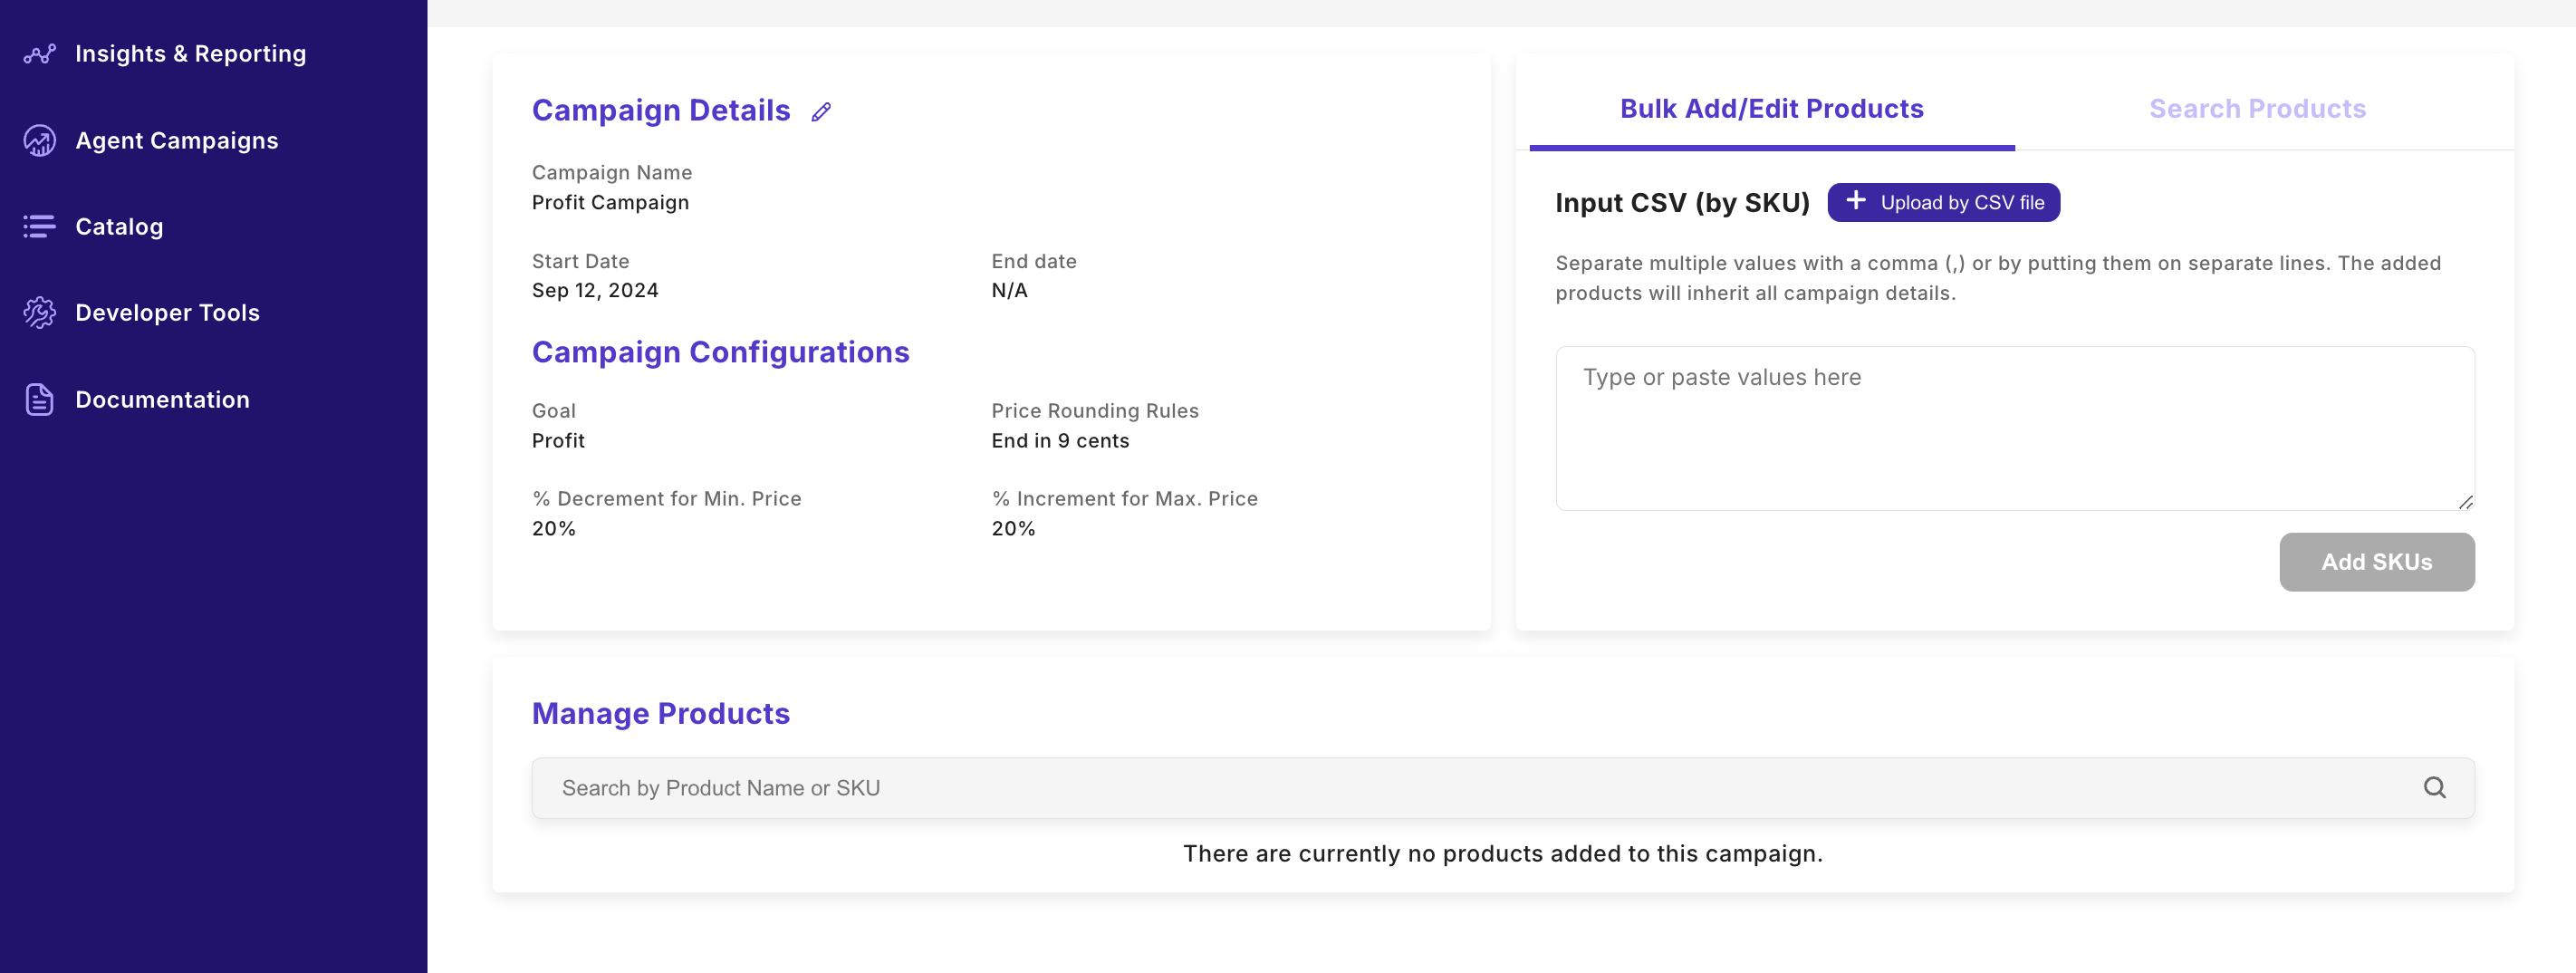
Add Products
You have 3 options for adding products to campaign:
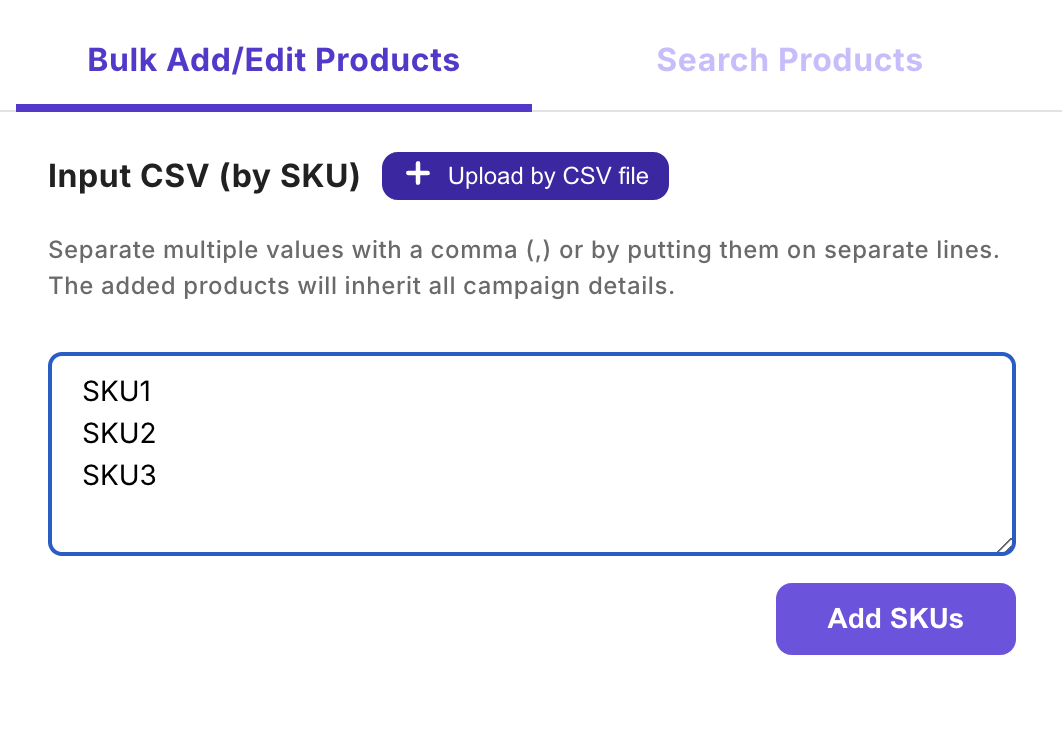
- Bulk input by SKU
- Add SKU numbers, either separated by a comma(,) or by putting them on separate lines, directly into the input box.
- SKUs added this way will inherit all campaign details.
- SKUs added this way will auto-generate prices based on their standard price and the campaign min/max range. Prices can be edited on an individual basis after they are added.
- Add SKU numbers, either separated by a comma(,) or by putting them on separate lines, directly into the input box.
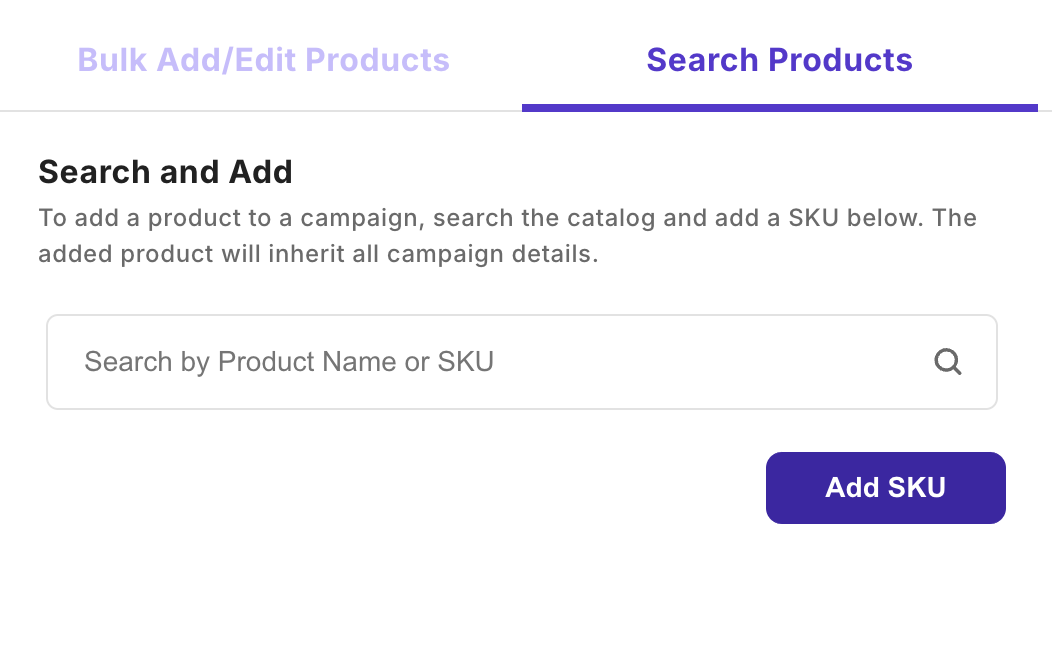
- Search and Add
- Search for a SKU within your catalog directly on the page and add to campaign.
- SKUs added this way will inherit all campaign details.
- SKUs added this way will auto-generate prices based on their standard price and the campaign min/max range. Prices can be edited on an individual basis after they are added.
-
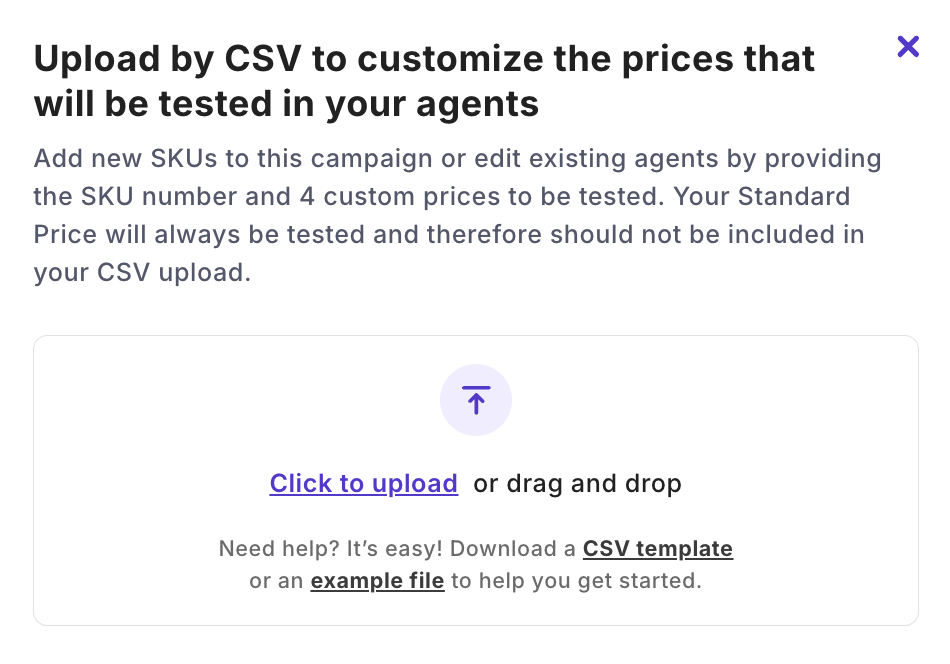
Add by CSV File (requires specified prices)
- Upload a list of SKUs and 4 corresponding prices to be tested via CSV file
- Adding by CSV file does not auto-generate prices. Only add by CSV file if you are specifying the exact prices you want to test in your agent.
- Standard price will always be tested and therefore should not be included in your CSV upload.
- Reference the
Example Fileprior to CSV upload.
 Manage Products
 - Upload a list of SKUs and 4 corresponding prices to be tested via CSV file
As SKUs are added to the campaign, they will appear in the Manage Products section.
- To view existing or auto-generated price configurations, click into an individual SKU:
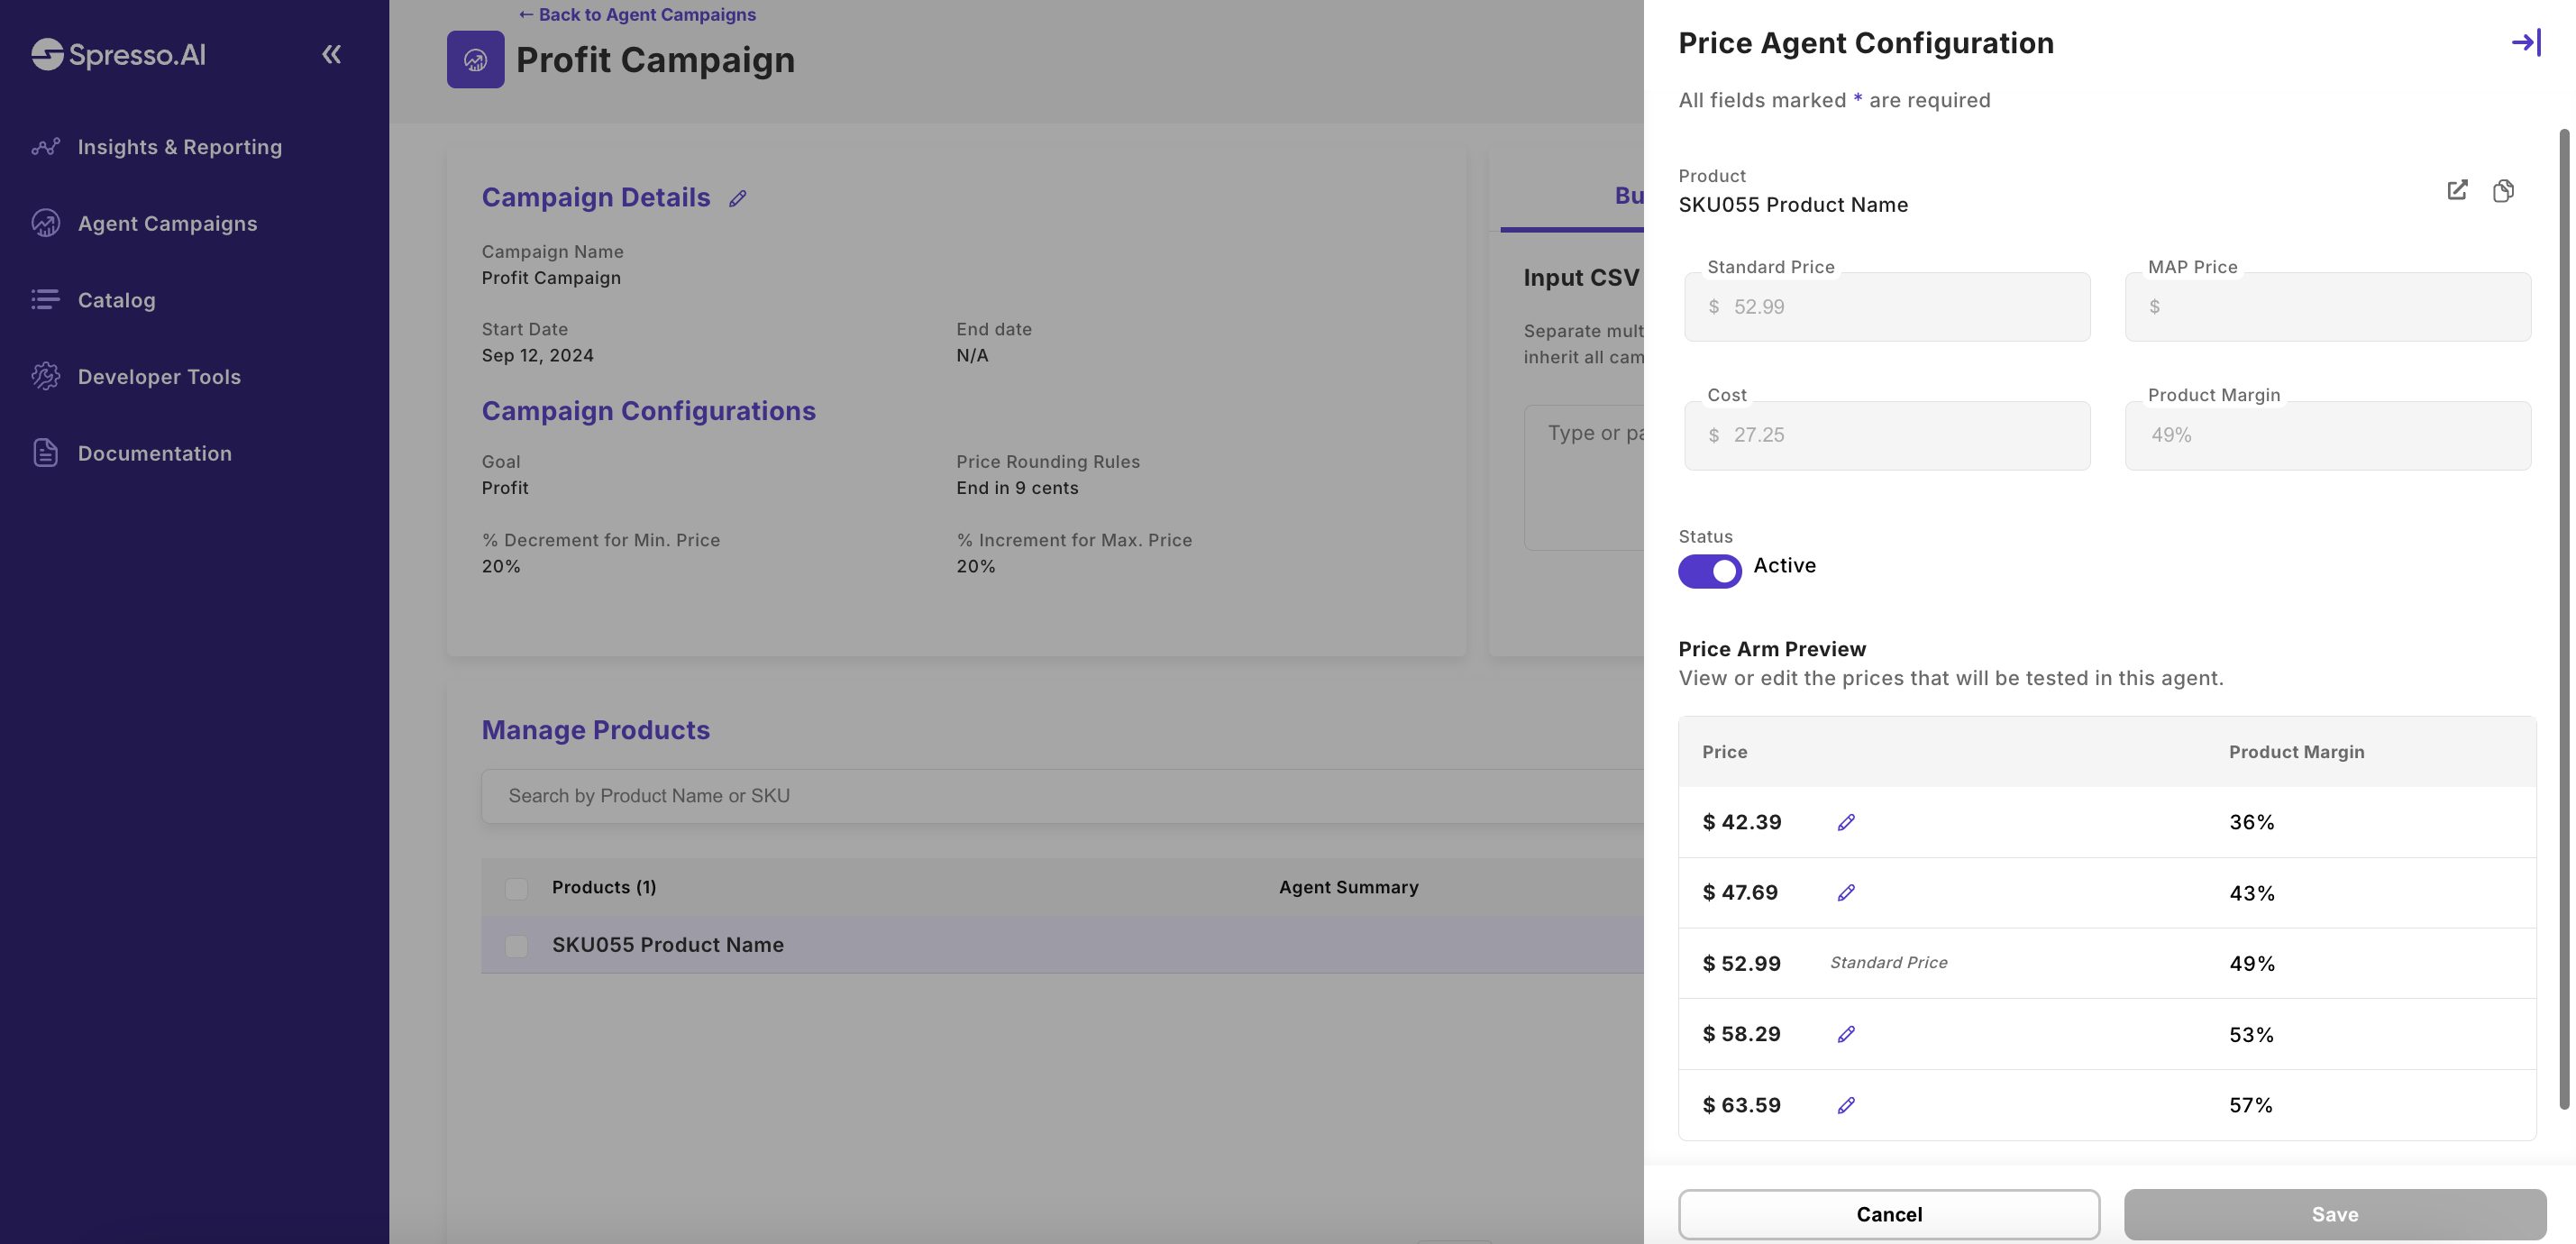
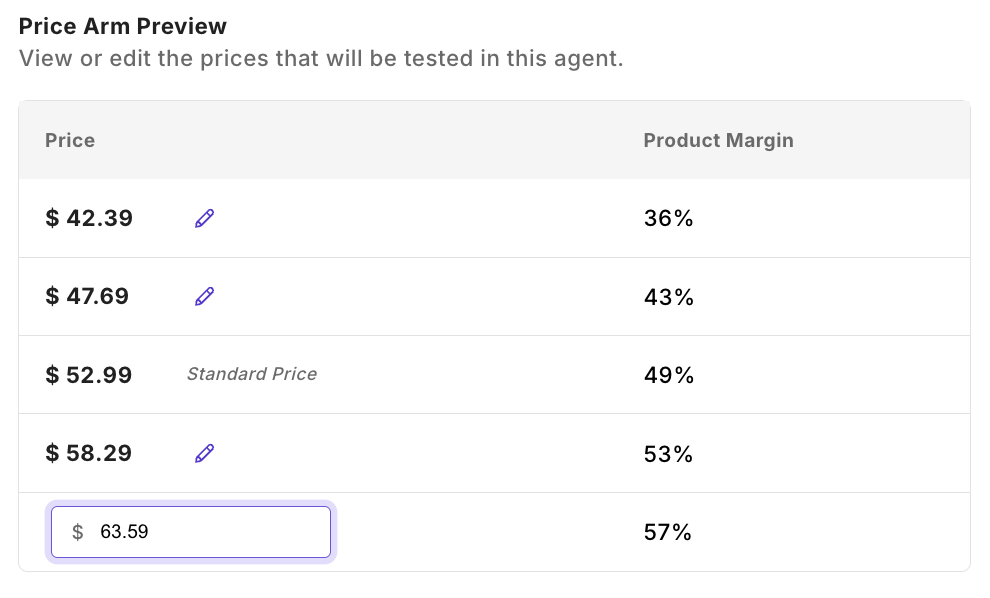
- To edit existing or auto-generated price configurations, click the pencil icon and add your desired price.
- We validate the below rules:
- Prices must be distinct
- Prices must be higher than MAP price
- Standard price must be included
- We validate the below rules:
- A
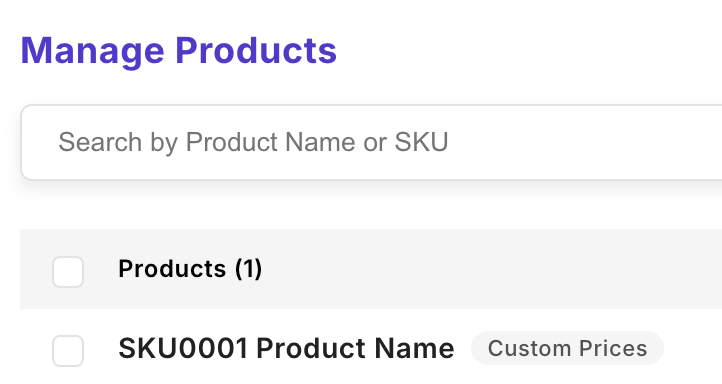
Custom Pricesbadge will appear if prices are edited to differ from campaign configurations.
- To disable a SKU from a campaign, toggle the item’s status from active to disabled. This will pause the price agent and display standard price on your website.
Edit Campaign
- Campaign Details (Campaign Name, Start Date and End Date) can be edited at any time. If any of these details are updated, the changes will apply to all agents in the campaign.
- Campaign Configurations (Goal, Rounding Rules, Min/Max Range) cannot be edited.
- If you need to change an agent goal, the corresponding SKUs should be moved to a new campaign with that setting. If a SKU is moved from one campaign to another, it will automatically inherit the goal, rounding rules and price range from the new campaign. New price arms will generate based on the new campaign settings.
- If you need to update rounding or prices for an agent, that can be done in bulk through CSV upload or individually on the agent side panel. See Manage Productshere.
- If a campaign is disabled, all agents within the campaign will be disabled.
- If a campaign is re-enabled, all agents within the campaign will be enabled.
Helpful TipsIf you’ve customized your agent prices and the standard price is updated, your agent prices will automatically adjust to reflect the new standard price. However, since agent prices were previously customized, campaign rounding rules will not be applied automatically.
As a best practice, it’s recommended to review your agent prices after any standard price change.
Moving Campaigns
If a SKU is moved from one campaign to another, it will automatically inherit the goal, rounding rules and price range from the new campaign. New price arms will generate based on the new campaign settings. Previous customizations from the former campaign will no longer exist.
Helpful TipsIf you need to update goal or min/max ranges in bulk, we suggest moving the items to a new campaign with the appropriate settings.
Campaign settings are always what you get by default and if you need to make a major switch, the solution is to move campaigns.
Updated 5 months ago
